
Create/edit forms
To create a new form click on the System module icon - and choose FORMS > CREATE in the top left menu.
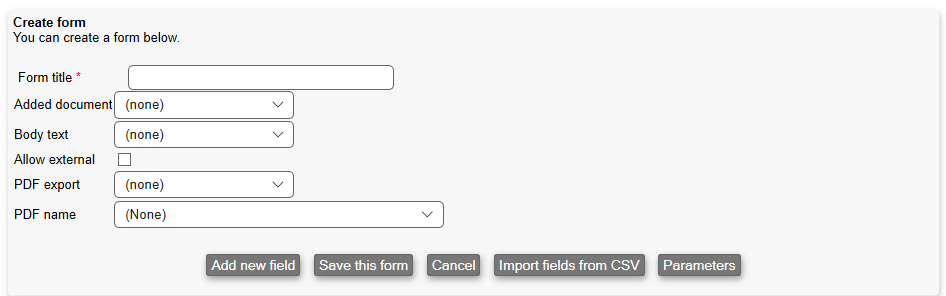
- Form title: The title of the form, so you can identify it later.
- Added document: Allows you to use an HTML template when combined with layout, to generate an HTML version of an answer. So an HTML version of an answer is first generated, and this can then be inserted into an HTML template (using the macro %qf_content%) and then you get the final HTML version.
- Body text: Choose the HTML template to use when sending the form externally
- Allow external: If you check this, a public link will be shown. Anyone in possession of that link will be able to fill in the form.
- PDF export: Allows to select a PDF template to be used for exporting this form.
- PDF name: Decides the naming convention when saving this form as a PDF. This is only used when you exporting a task/customer/equipment/etc. as a PDF and you include a specific form:

Add new field
To create the form, click 'Add new field' to add a field to the form. Notice that Microbizz limits the number of fields to approx. 1000. The user will be presented with the following window:
Field title and field type are required!
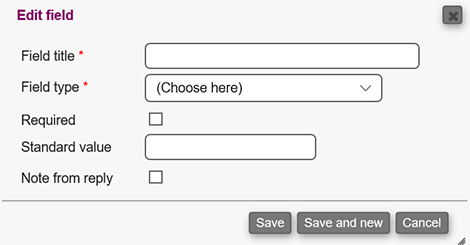
- Field title: The title of the field.
- Field type: Configures the input field type for this field. See below.
- Required: If checked, then this field is required.
- Standard value: The field will be pre-filled with this answer.
- Note from reply: If this is checked, then every time this form is filled in, the answer will be posted as a note on the object on which the form is filled.
Field types
There´s a wide range of field types which will be displayed when clicking "Choose here" next to the Field type.
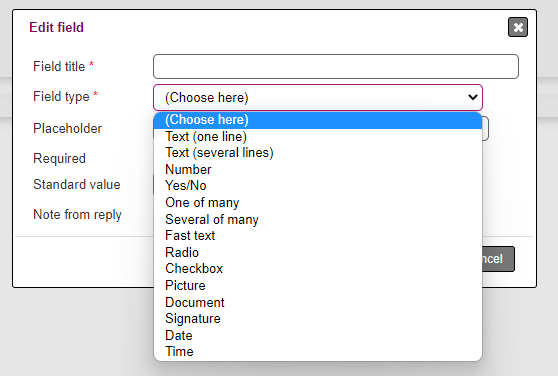
- Text (one line): Text of max. 1 line can be specified here.
Text (several lines): Here you can specify multiple lines of text.
Number: Here you can enter a number.
Yes / No: Here you can choose between Yes and No.
Dropdown: Here you can choose between several given options in a dropdown menu.
More of many: Here you can choose several of many given options.
Fast / static text: Static text is written here (The field cannot be added to the information in the form)
Radio: Here you can choose one of several given options.
Checkbox: Here you can check a specific box.
Picture: Here you can add pictures to the form
Document: Here you can add files to the form
Signature: Here you can add a signature in the form.
Date: A date can be specified here.
Time: Here you can specify a time.
Different options related to the field type may appear depending on which field type you choose. When you have filled out the appropriate information, you can either "Save" the field or choose "Save and new", if you wish to create more fields after you've saved.
It is also possible to choose whether a field should be required - that is, the field must be answered / filled in.
Picture
A picture question simply asks a user to input a picture in the form.
Simply add a name for the picture and decice whether the question is required by the user.
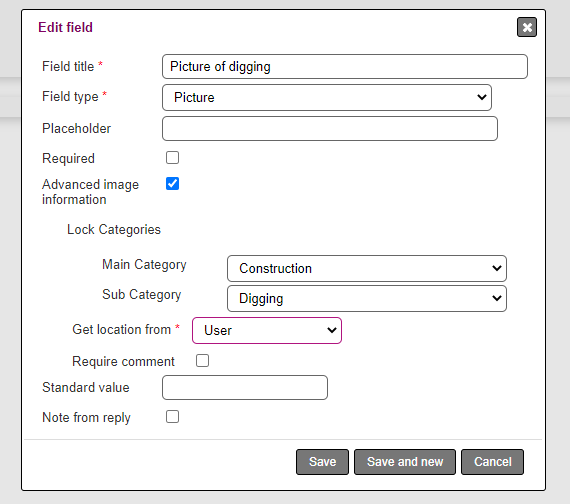
Advanced information
When setting up a form question of the "Picture" type, it's possible to choose "advanced image information".
Doing so will require a user to add further information to a picture. This being:
- The main category
- Sub category
- Location
- A comment
When setting up the question, it's possible to suggest the main/subcategories, and where the suggested location should be derived from (Users device or object the form is being completed on), and if a comment should be required.
Form flow
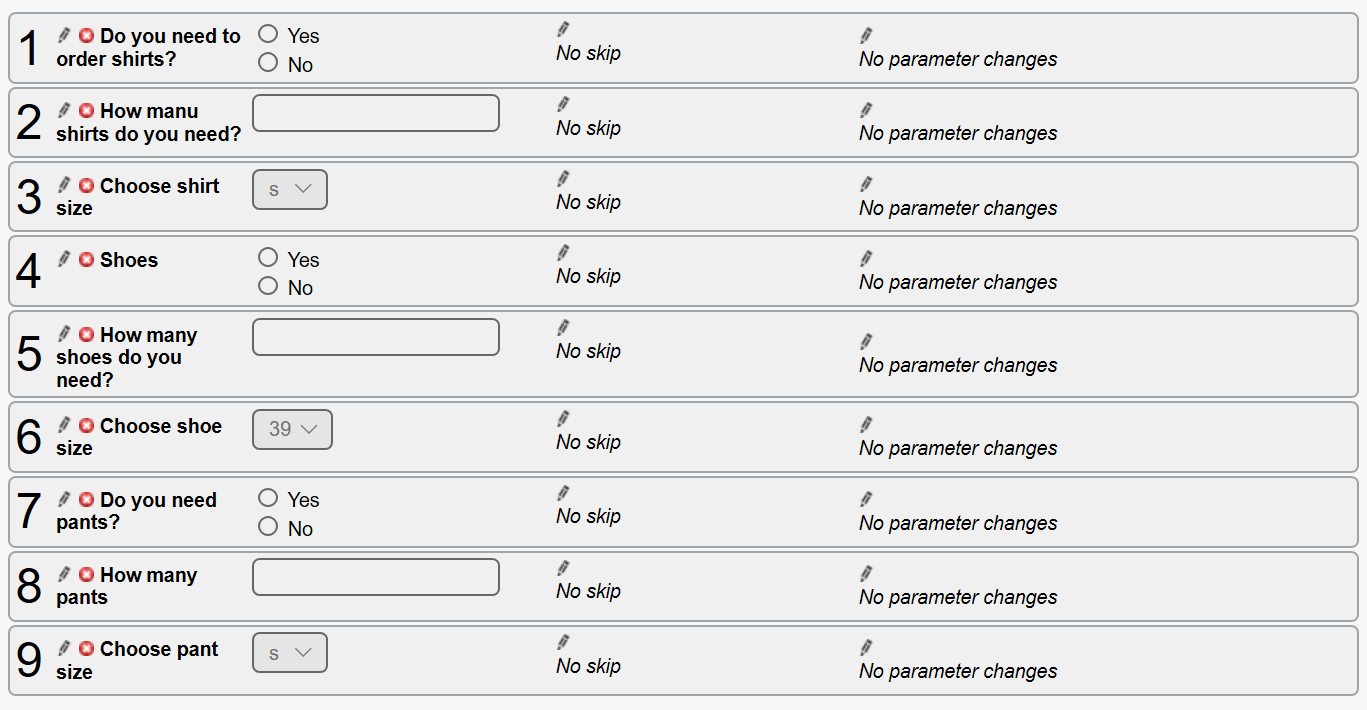
It is possible to skip questions in a form, based on what is answered to a question. In the example below, it wouldn't be relevant to ask about number of shirts or shirt size, if the answer to the first question is "no".
Click on the first pencil icon to the right of the question, to edit flow. This will bring up the flow windows:

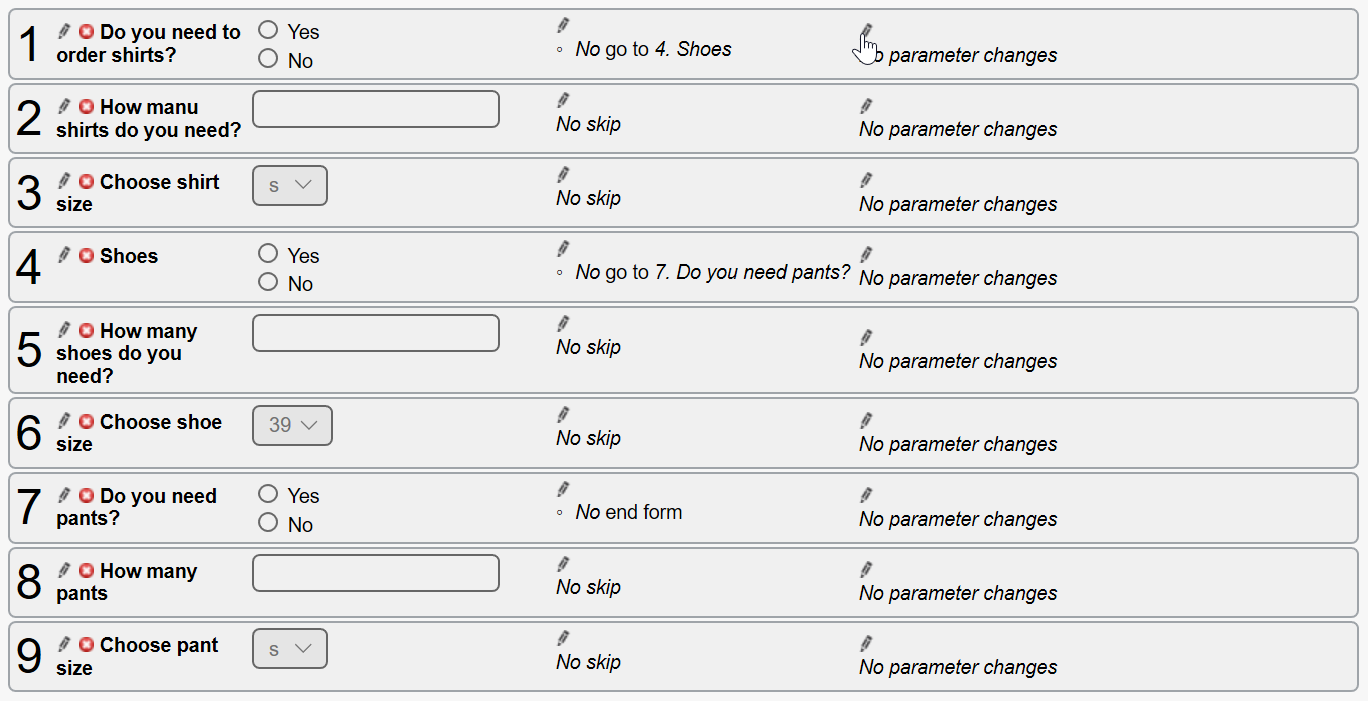
Based on the answer, you can select which question should be next, which will skip all questions between this question and the selected question. The default is not to skip anything, and you also have the possibility to end the question form all together.
Parameters
It is possible to assign parameters to question forms, which are values that change based on what is answered. Combined with question form actions, which we will learn about later, the question forms becomes a powerful tool.
Add parameters
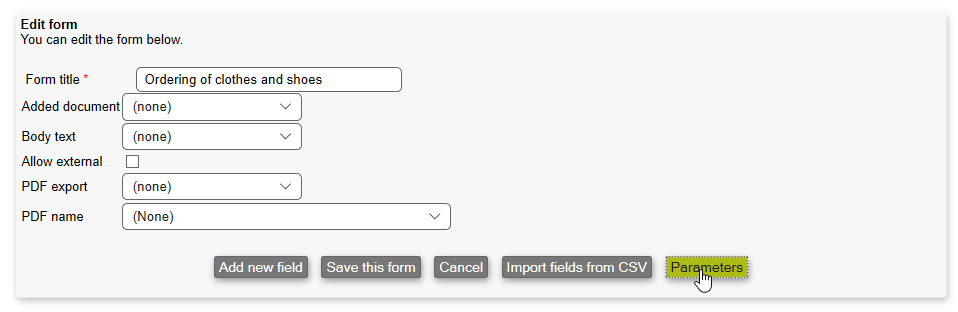
While editing your form, you can create parameters, by clicking the "Parameters" button while editing the form. A popup window will appear:
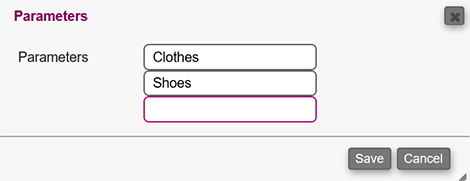
In this window, you can name your parameters, and make as many as you want. To delete a parameter, just empty the field.
Adjust parameters
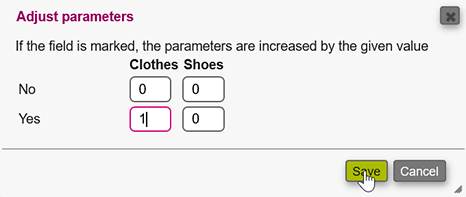
When parameters are created a new section appears besides each question. In order to make an answer influence a parameter, click the rightmost pencil to bring up the question parameter window.
In this window you can decide how each answer will influence each parameter. In the example below, answering "Yes" to the question will increase the Clothes-parameter by 1.
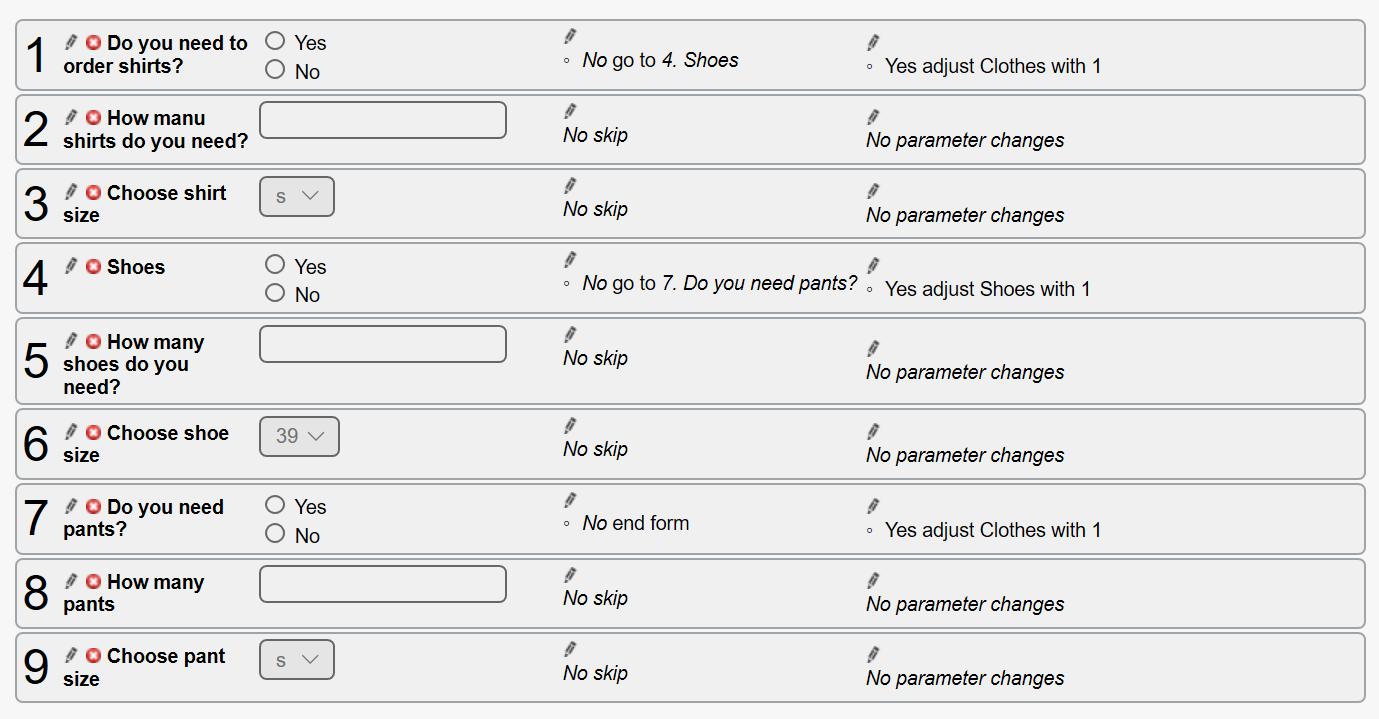
This is reflected in the main edit window:
Import field from CSV
When importing fields from CSV files the fields will be add to the form; each line in the file describe a field to add. The CSV file may also specify skip.
Basic example
"question", type, variables |
|---|
The first column is the question and must it be wrapped in quotation marks. The second column is the type of field. The remaining columns are the value or values, if there are any.
The following field types are supported: menu, radio, multi, multiple, label, textarea, text, number, checkbox, time, date, picture, signature, yes.
Simple field example
| "Are you hungry?",yes |
|---|
In a simple field such as the yes field, you don't need to put in values.
Complex field example
| "What is your favorite color?",menu,"Blue","Yellow","Red" |
|---|
This would create a field with the question "What is your favorite color?" and the answers "Blue", "Yellow" and "Red".
Adding skip
If the field is supposed to skip to another field there should be given a -jump suffix at the end of the field type column, and the actual skip value(s) should be specified after each value.
When adding skip it's good to note that the skip will skip the given amount of fields which you put in.
The following field types allow jump: text-jump, textarea-jump, number-jump, checkbox-jump, signature-jump, time-jump, date-jump, picture-jump, yes-jump, multi-jump, menu-jump, radio-jump
There are a few predefined jump values:
| 0 | No skip |
| -1 | To end. |
Simple skip example
"What will you eat tomorrow.",text-jump,-1 |
|---|
In this example the moment the field has been fullfilled the rest of the questions will be skipped.
| "Skal der fyldes olie på",yes-jump,4,0 |
|---|
On answers that can have multiple values. put in both of the values.
Less simple example
| "Fix Banana Radio",radio-jump,"Salat Radio",-1,"Salt Radio",0,"Bffff Radio",0 |
|---|
On types where you have to put in values. The skip values have to be put sequencial to each answer.
Translations
If a form is used by employees from multiple countries then it may be desirable to translate the form to different languages.
This can be done from the translations page in the system module.