
Templates
Task templates are used to make it easier to create tasks and do it correctly, as templates usually are created from the backend by teamleaders or administrators who can then standardize what information the tasks should contain. A template contains most of the information that you normally fill in when you create a task.
Using templates
Using a template can be done wherever it's possible to create a task. Both from the web system and the app.
This section will focus on creating and managing templates.
Search templates
Task templates are accessed through TEMPLATES > SEARCH.
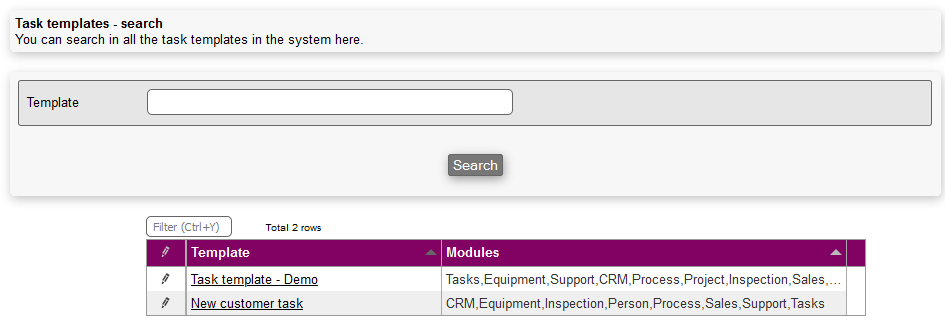
From this menu it's possible to:
- Search templates: Search for existing templates
- The list of templates: A list of the existing templates
By pressing the pencil menu next to an existing template, it possible to:
- Edit: Edit the template
- Rename: Rename the template
- Access: Decide in which module the template can be used. Learn more in this page
Create templates
Creating a template is done by accessing the menu TEMPLATES > CREATE.

The fields that can be used are the standard ones plus any checkpoints or custom fields you may have declared.
- Template title: The title of the template
- Task type: Task types are used to identify which type your tasks have, grouping those that share similar characteristics. There are a couple of types to choose from in Microbizz, with the most common one being Adhoc; a standard task, which doesn't need any planning in advance (e.g. as a repeated task). Learn more about task types on the following page
- Default company: Choose a default company for the template
- Delivery: Add a company name and address the task must be delivered to
- Description: The description of the task
- Use subcontractor: If checked, a subcontractor is used, and you must therefore choose a company as such, and fill out any relevant information regarding it e.g. emails and addresses
- Work area: Choose the work area for the template
- Time estimate: The time (hours) the task is estimated to take
- Status: The default status for the task when created from the template
- Competences: Choose the competences needed for undertaking and completing the task. For more on this, please refer to the User module
- Subscriber: Choose users that want to be informed regarding the task
- Subscriber from CRM: Choose a person from CRM that wants to be informed regarding the task
- Subscriber (ext): Choose a person that wants to be informed regarding the task
- Subscriber (ext) from person role: Choose a person role that you want to be informed regarding the task
- Days to start: The number of days before the task starts from the day the task was created
- Days to deadline: The number of days before the task ends from the day the task was created
- SLA: Abbreviation for Service Level Agreement. For more on this, please refer to how to configure your SLA
- Invoicing: Here you can choose how the task should be invoiced; see the section about Invoicing for details
- Consolidate invoice: see the section about Invoicing for details
- On seperate invoice:see the section about Invoicing for details
- Invoice separately from project: see the section about Invoicing for details
- Invoicing: see the section about Invoicing for details
- Days to n. invoicing: For repeating exact times task types, the next invoicing period will be set from the day the template creates the task, plus the amount of days entered in this field
- Org. team: Choose the team for the task
- Responsible from CRM: Choose a person from CRM that is responsible for the task and its completion
- Org. responsible Type: Choose from one of the following:
- Active user: The user who uses the template to create a task becomes responsible for it
- Selected user: Choose a user that is always going to be responsible for the task
- Priority: The priority for the task. The choice can be from 1 to 5, with 1 referring to that the task has the highest priority, while 5 refers to that it has the lowest
- Show on extranet? If checked, the task will be visible on the extranet
- Visibility: This is just like the visibility field on the task
- Files: Attach up to 4 files to the task when created
- Product use: Add in advance product use to the task when created