
Files
The files tab is used to store files that can be opened, edited, and shared.
The files system can work together with file synchronization functionality to sync files with a remote file server.
Files functions
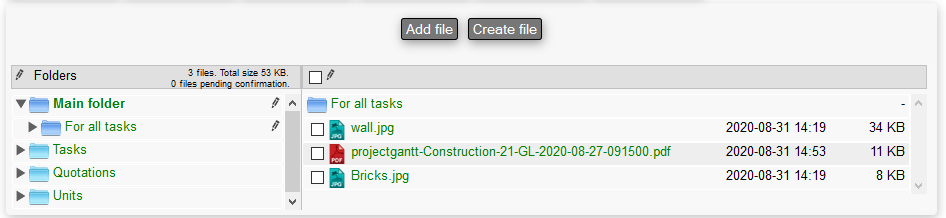
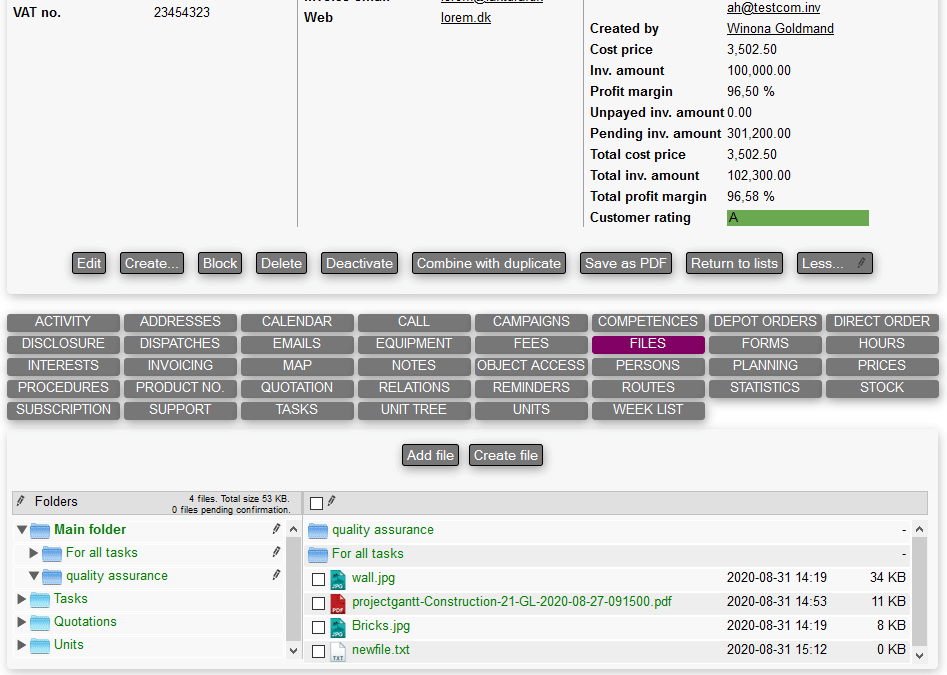
The picture below shows the content of a files tab.
On the left side there are:
- Regular folders: Folders created by the user or the system, that are related to the object at hand
- Virtual folders: Folders that are shown but do not primarily belong to the object
The first folder shown is the main folder, where files generated on the object are automatically placed. This is counts for pictures taken on the app.
Show files
Files can be shown by preview or download.
As shown on the video, simply press on a picture to see a preview, and then use arrow keys on the screen or your keyboard to browse through the content.
If the file can't be opened by the browser it's automatically downloaded instead.
Add/Create file
Adding files to the folders can be done in the following ways:
- Drag N' drop: Simply drag a file to the right side, og one of the folders on the left to upload the file
- Add file: Manually upload a file
- Create file: Used to create a text file directly to a folder
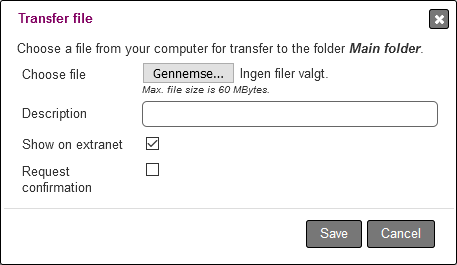
Add file
Pressing add file will open the following screen.
From here the user can:
- Choose file: Select the file from you computer/device to upload
- Description: Add a text describing what this file is or used for
- Show on extranet: Decide if this file should be shown on the extranet
- Request confirmation: When the file is shown on the extranet, it can ask for approval (this is only available if enabled by Ventu)
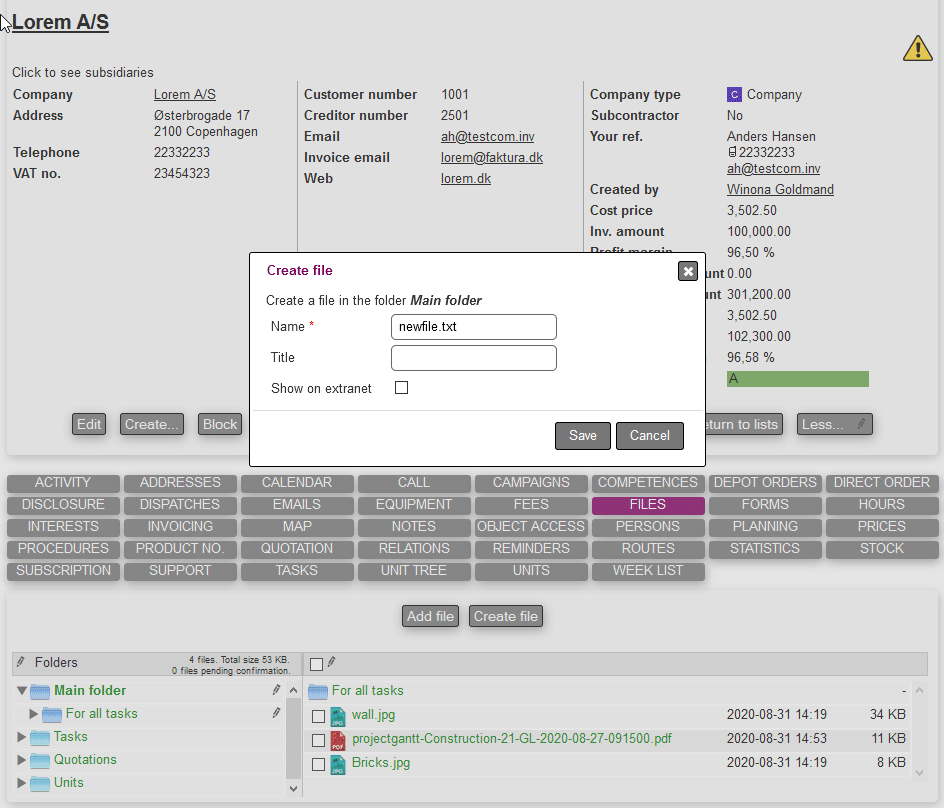
Create file
Pressing create file, lets you create a text file that can be written directly in the files tab without the need of downloading/uploading.
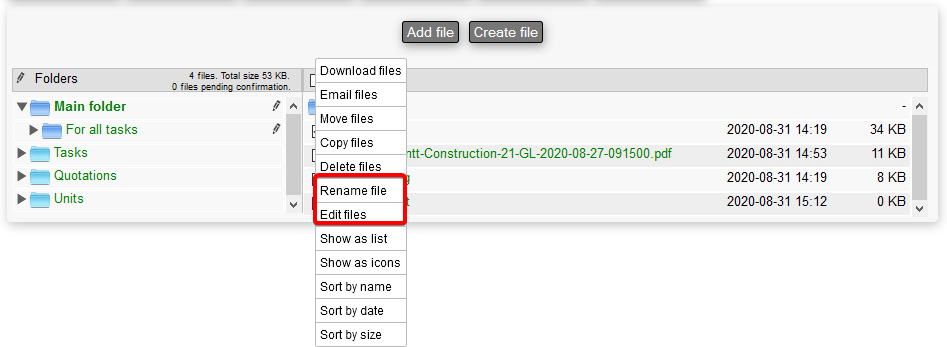
Edit files
To edit existing files, we firstly need to select the ones we would like to interact with and then press the pencil above the right side.
This will give you multiple options.
The ones used to edit are:
- Rename file: Edits the name of the selected file
- Edit files: Will open the same menu as mentioned in the add file section
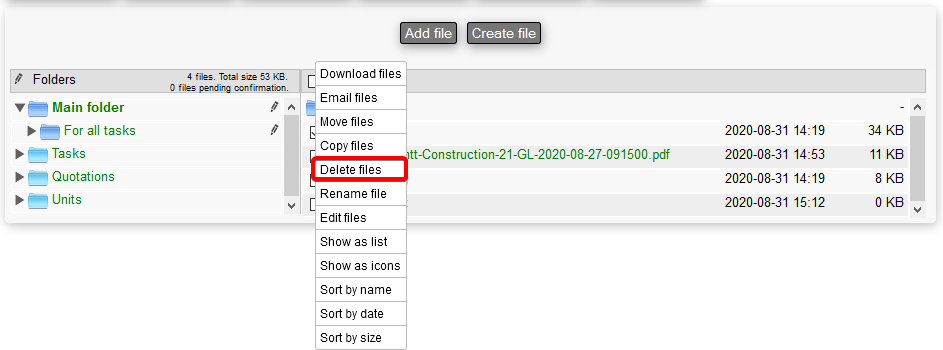
Delete files
Deleting is also done with the same pencil menu on the right side, and then selecting delete files.
Other functions
The other functions in the same files menu regard:
- Sorting and viewing options: Where alternative sorting and viewing options are available
- Email files: Opens up the regular mail sending windows where a mail can be written(chosen) and the files are sent
- Move: An alternative to drag n' drop where a specific folder is chosen in a separate window
- Copy files: Create duplicates of the selected files
- Copy files to another object: Create duplicates of the selected files, but save the duplicates on another task / company / equipment /etc.
Folder functions
Let's take a look at the options available on the left side where the folders are represented.
The virtual folders can't be changed, but the regular ones, will appear with a pencil besides them.
Create folders
Creating new folders is done by using the pencil menu on the folder you would like to create a subfolder for. An example is shown in the video.
After creation, it's possible to use the folder.

Edit and delete
Through the pencil menu it's also possible to delete and rename the folder.
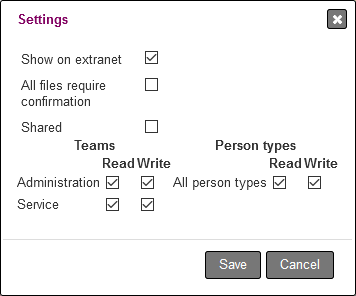
Folder settings
Choosing settings in the pencil menu, we can access a menu as shown below.
From here the following options are shown:
- Show on extranet: Toggle show the folder and its content on the extranet
- All files require confirmation: Toggle confirmation of the files within the folder
- Shared: (Works only on companies) Choose this option to show the folder on all tasks created on this customer. The folder will be shown as a virtual folder
- Read/write: Choose if internal teams members and or persons (on the extranet) can read and write the folder and it's content
Standard folder structure
It's possible to apply a certain custom folder structure on every object a certain module where the files structure is used. See the video below.
This means that every object created after this action is done, will already have a certain files structure. (which can also contain files)
This is a useful tool when making sure that each object created already has containing folders ready to be used.
Updating a folder structure is done by simply creating a new one and follow the steps again.
Manage standard folder structures
The menu CONFIGURATION > FILE STRUCTURES in the System module allows you to get an overview of the standard file structures.