
Normal
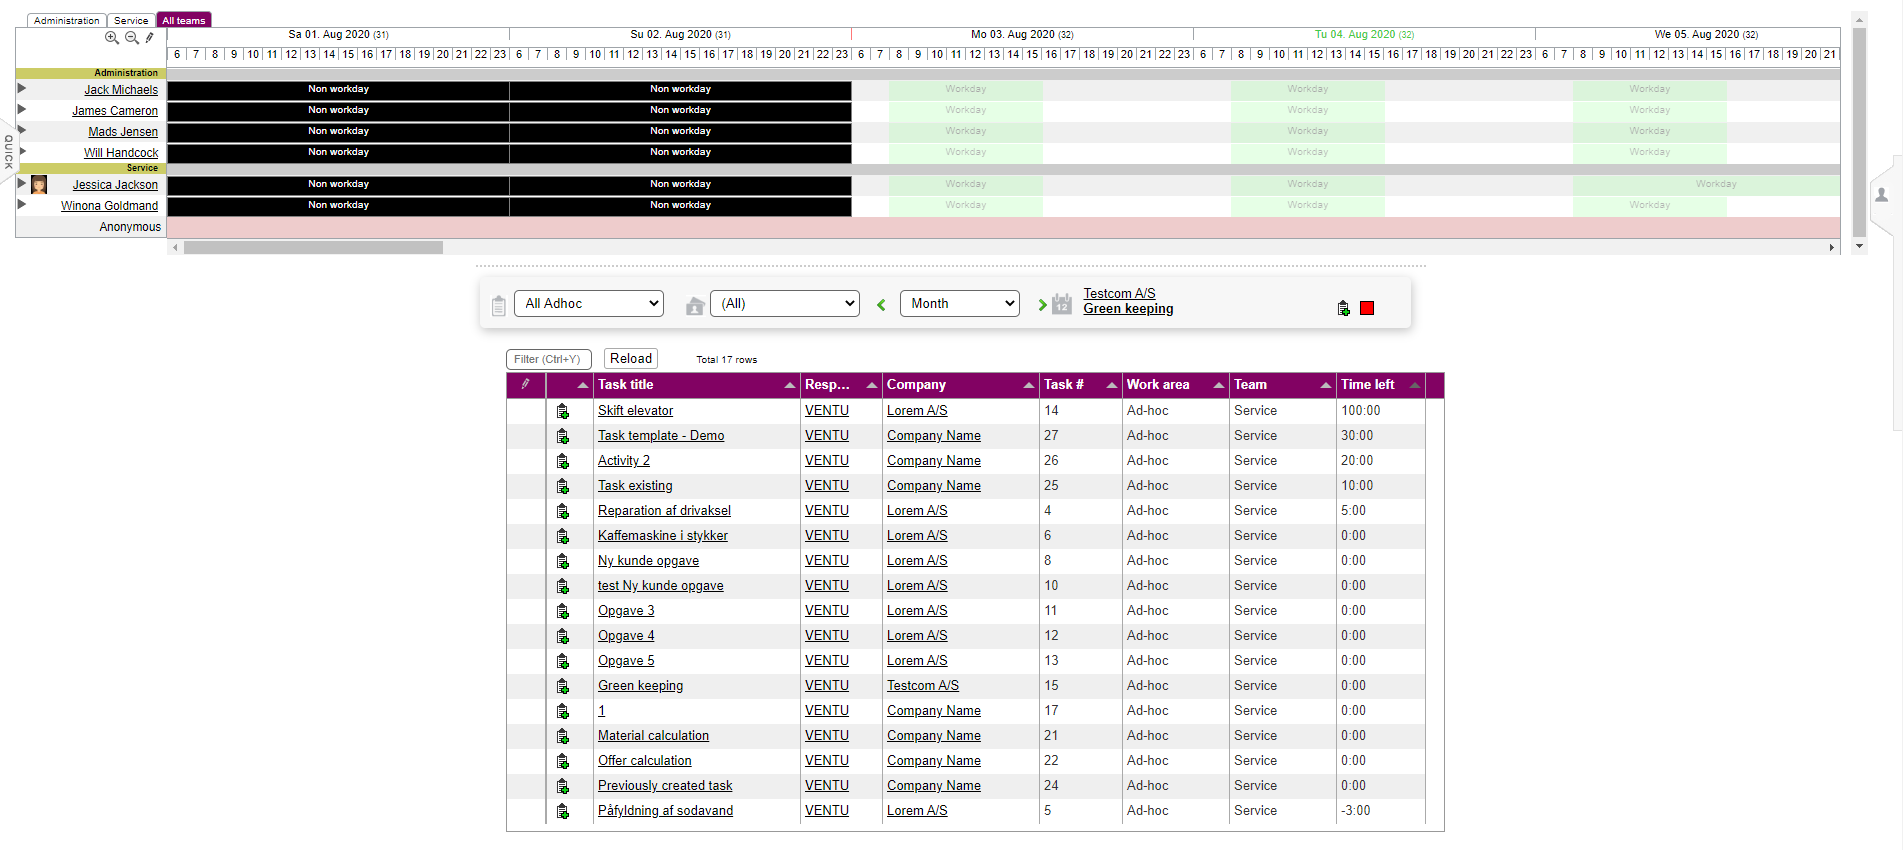
The "Normal" planning page displays the planned tasks on a timeline, and allows you to plan a task by dragging it from a list of tasks to the timeline, and it allows you to change planning by dragging the planning between users, or between days.
Full day plannings (from Full days) are shown but cannot be edited or deleted.
Timeline
The timeline displays a line per user in the selected team; each line covers a period of time.
The plannings are displayed on the timeline, the duration of each planning is indicated by it's width.
Above the timeline are tabs for the available teams, click on a tab to display the planning for that team.
The last user in the list is the "Anonymous" user. This is for plannings that are not allocated to a user; the time will still be included in the amount of time planned for the task.
Left side of the timeline
The left side of the timeline display the users. The users are grouped according to their home group; if users from multiple home groups are included then a yellow header will appear above each home group - you can click on the header to hide the entire team.
If a user has multiple overlapping plannings on the same day (eg. one planning from 8 to 15 and other from 10 - 12) then the plannings will normally appear on multiple lines. There is a setting named "Allow users to be collapsed" which controls if these lines are collapsed to a single line or not. A fold/unfold icon will appear next to the user's name to allow you toggle this for each user.
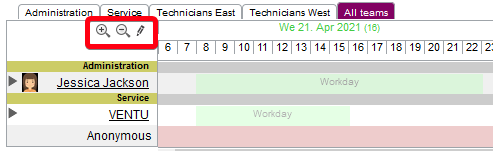
Above the names of the users are the two zoom icons, and a pencil icon which gives access to a menu with the following:
- Clear period: You can clear any planned task for a specific user in a certain timeframe
- Show entire day: All the hours of the day are shown
- Show working hours: Only working hours of the day are shown
- Show part of day: You can declare the following hours for the day:
- First hour
- Last hour
- Weekdays: Choose any day of the week that you want to see in the timeline
- Show equipment: This allows you to see equipment reservations on the timeline
- Save this view for all: This forces the changes you have made to the timeline view to every user in your solution
Toolbar
Below the timeline is a toolbar with a task filter, a team filter, a period selector and information about the currently selected task.
Various task filters are available; when you select a task filter the list of tasks is updated.
The team filter only applies when the task filter is either "Pending planning", "All Adhoc", "Unplanned on date" or "Projects".
The period selector allows you to select if you want to display a single day, a week, two weeks or a whole months. The longer the period the slower the system will be.
Click on the calendar, or on the green arrows, to switch to another date.
On the right side of the toolbar is a small icon which represents the currently select task. You can drag the icon to the timeline to plan the task.
Hold the mouse pointer over the coloured box at the end to see information about the colour coding of the planning.
Add planning
When dragging a task to the timeline, you can schedule it to the appropriate users as follows:
You can also drag a task to another date or time. You can also drag the left and right edges of a box to change its duration.
Evidently, the remaining time will be shown to the right of each task and will be increased or decreased depending on whether you're adding or removing tasks from the timeline, respectively.
Edit planning
When you click on an existing planning you will get a menu with the following:
- Edit production: Replan the task by specifying new dates and times
- Extend production: Prolong the task's duration and amount per day
- New production: Create a new plan for the selected task
- Select day: Selects all schedules for the user on the selected date
- Delete production: Delete the plan
- Delete future prod.: Delete any future planning for the user
- Plan route: Allows you to plan a route for the selected task by choosing a start address, an end address, as well as sort the day's tasks in the order you want them to be completed in
- Add user: Allows you to add more users for the specific planned task
- Lock / Unlock: You can choose to lock or unlock the planned task
- Request confirmation: Only available if the solution has SMS turned on. Sends an SMS to the user, the user must reply with PRODOK to indicate that it is OK.
- Send SMS: You can send an SMS to a person of your choice
Extend production
This will create new copies of the selected production, from the date of the selected production and until another date.
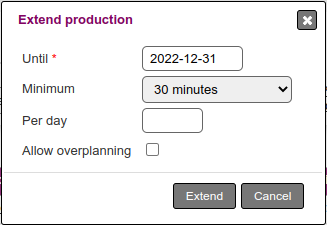
The Minimum duration field specifies the shortest duration allowed for the new productions, this is to avoid fitting a 2 minutes production into any tiny gap there might be.
The Per day field specifies the longest duration allowed for a production.
Users
On the right side of the screen, you will find a toolbox that gives access to choosing which users should be shown on the timeline.
As seen below, the toolbox will appear once you move the cursor across the icon, and disappear again when you move the cursor away from the box.
This toolbox can be locked so that it always will be shown - this is done by clicking on the small pin at the top right corner.

You can choose which users should be available on the timeline from the "Users"-menu, and can be filtered by choosing which registration types and/or team the users we want to administer are attached to. A user must have at least 1 work day that matches the selected registration types, otherwise the user is excluded.
"Competencies" allow you to specify certain competencies that the users need to have, in order to be shown on the timeline.