
Custom fields
In Microbizz it is possible to add your own fields (custom fields) to the existing information. It´s a possibility found in many of the modules. In the User module you can add custom fields to users, in the CRM module for you can add custom fields to companies, and so on.
Custom fields can be created from the SETTINGS menu in each module, usually through a menu called CUSTOM FIELDS. Some modules support custom fields on several different objects (meaning forms of data), and then the menus will be called something else.
The examples on this page are based on the User module, there are no major differences for the other modules.
Access, view and create custom fields
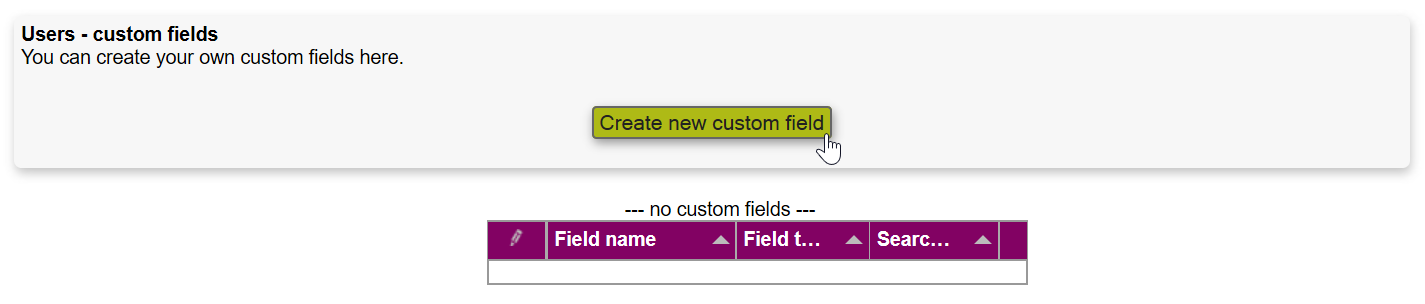
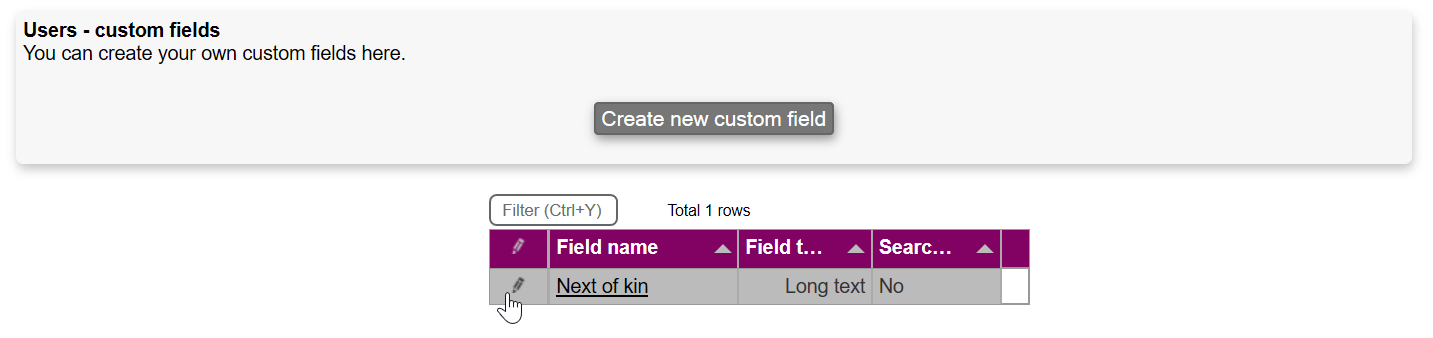
Choose SETTINGS > CUSTOM FIELDS in the top menu. The existing custom fields are listed; to create a new custom field, click the "Create new custom field" button.
Creating custom fields
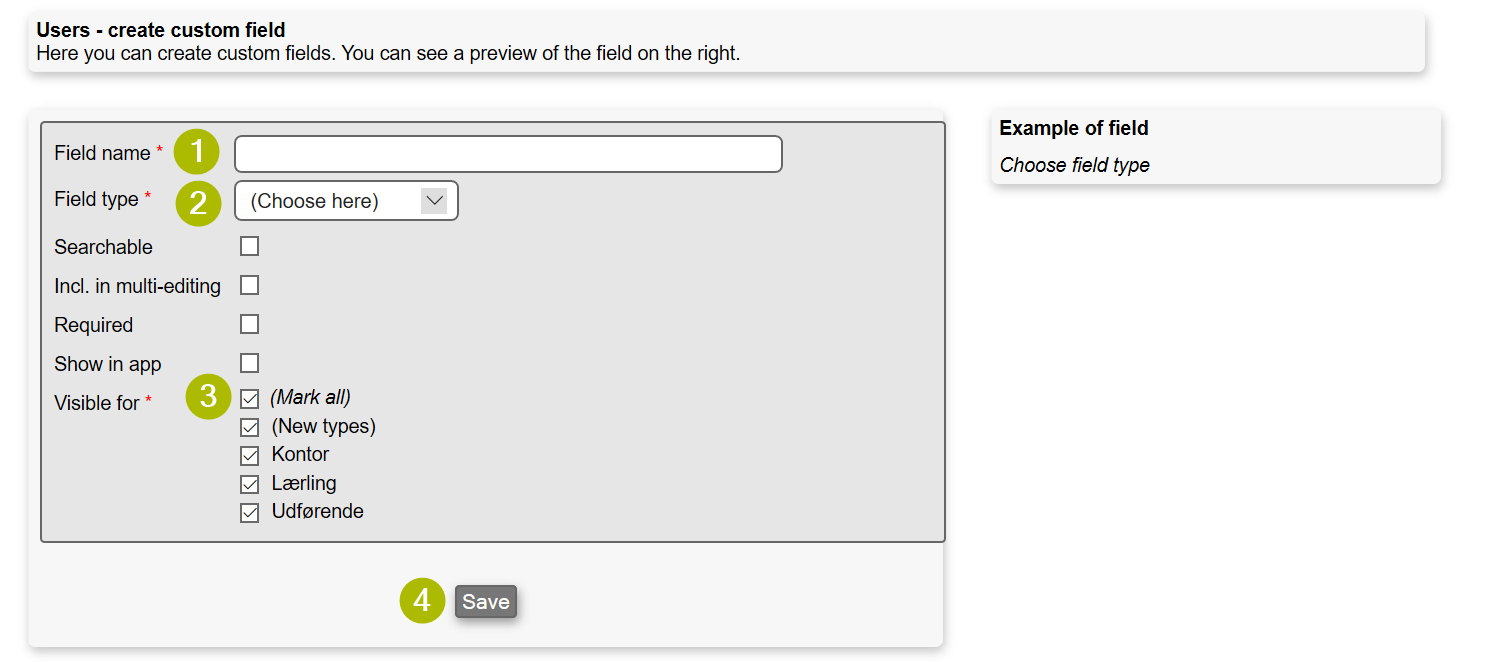
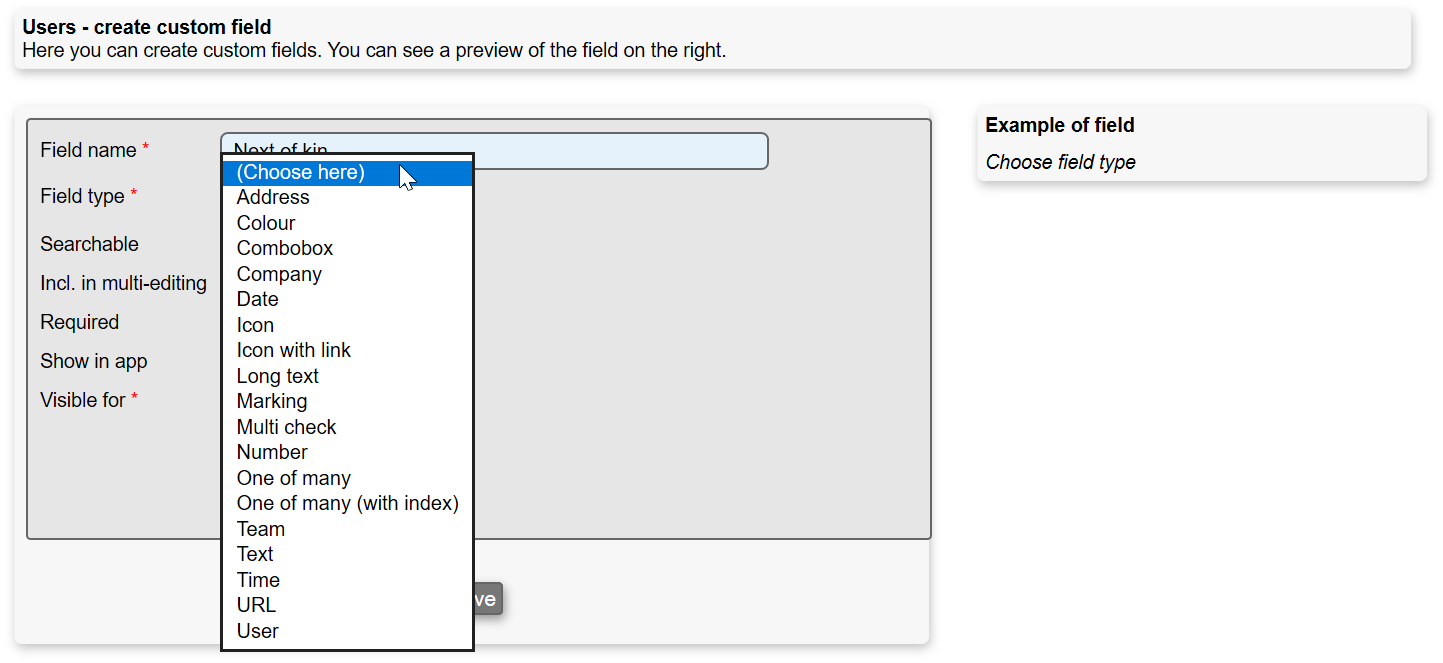
Name the field
Select the field type
Choose who the field should be visible for (this varies depending on the module)
Save
If desired select if the field should be searchable, included in multi-editing, required and or shown in app.
Choosing searchable means, whether the field should be visible when searching and whether you should be able to search on the entered parameters. There is a limit to the number of searchable fields you can have.
Visibility concerns to the module in question. In the User and CRM module for instance, you will be able to choose which user type or company types the field should be visible for. In the Task module it is the work area that controls visibility, and for equipment it is controlled by the type of equipment. If you mark the "(New types)" option then the field will automatically become visible for any new work area / user type / company type / etc that you create afterwards.
That the field is show in the app means that it is available in the API, and it sent to the app and may be displayed by the app.
Creating a custom field - example
If you for instance wish to add a custom field to users with next of kin information, the following describes how it is done.
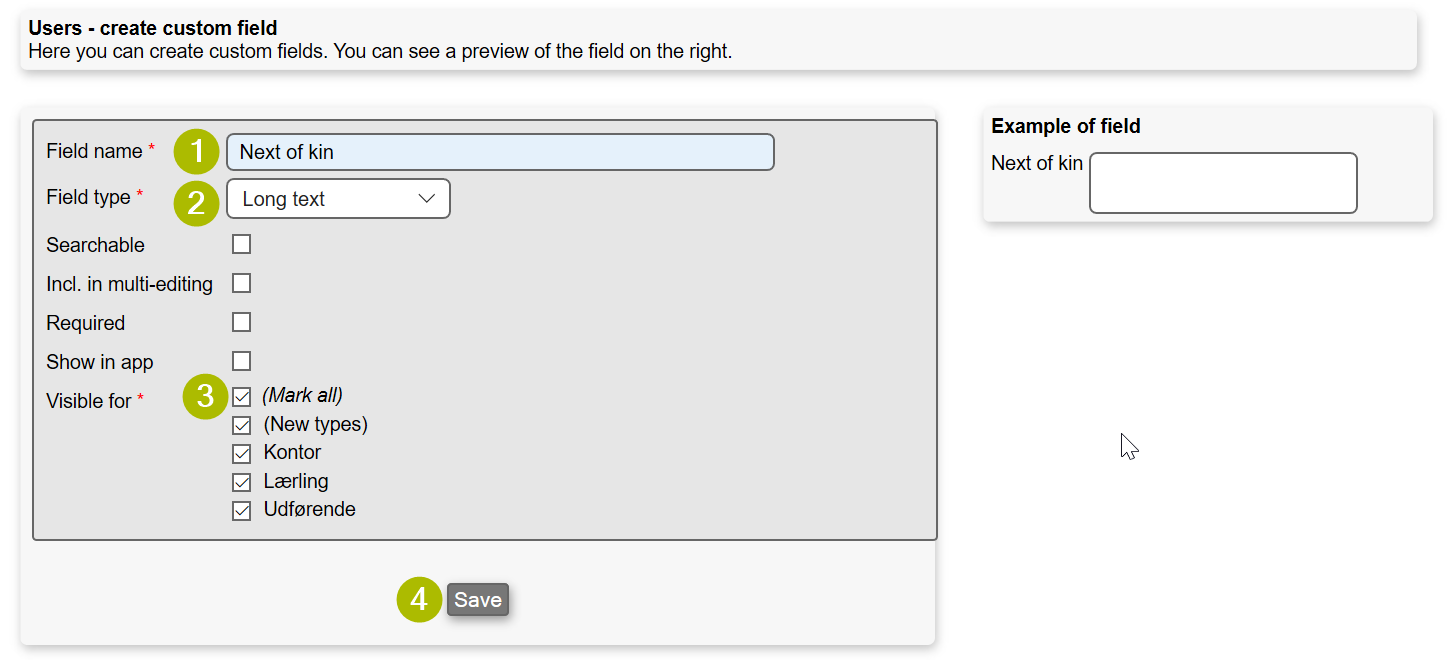
The field is named.
Field type: Long text is selected, making it possible to write more than one line of text (further info on field types can be found below this example).
The field is made visible for all types. Since this custom field is created in the User module, the user types are being displayed, had the field been created in for instance the CRM module, company types would have been displayed instead and so on.
Saving
In this Microbizz setup layout has been added in the User module in which we are creating this custom field. Saving the custom field will therefore give following warning:
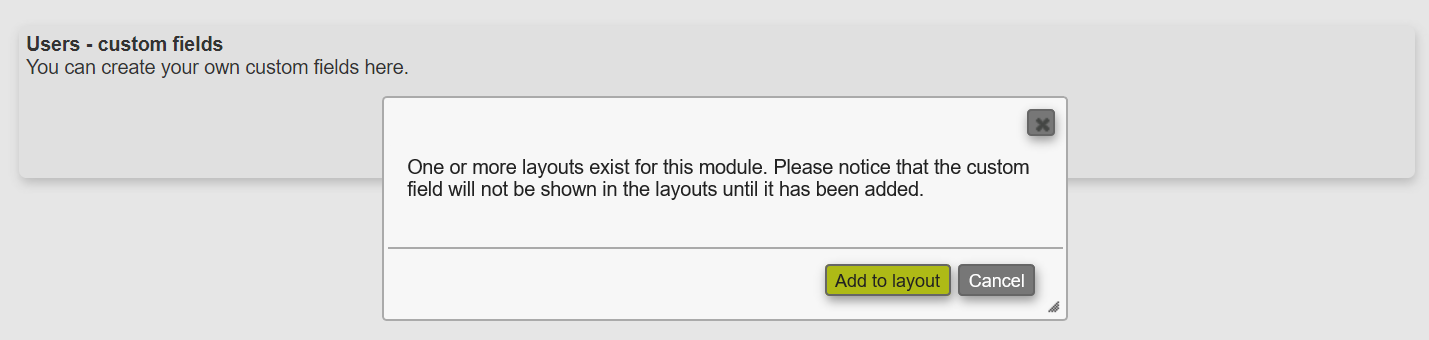
In short this means, since the module uses the layout feature, the field has to be added to the layout in order for the field to be displayed. Layout is a general cross module feature in Microbizz the same way as custom fields are.
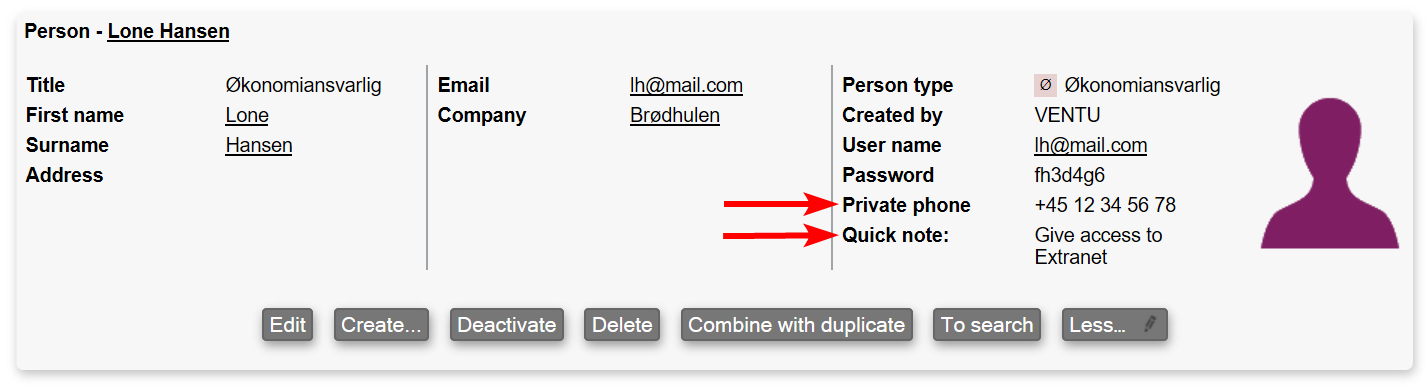
If no layout has been created in the module, the field will automatically be added below the last standard field in the system. The field will only be displayed in the details page if filled out. If the field isn't filled out, you will only be able to see it when editing the information and not when creating new content. Here we've added the custom fields: "Private phone" and "Quick note" custom fields in the Person module, the information shows because it's been added during editing.
Field types
Depending on the field you wish to create a long range of field types can be selected. Field types can be dropdown menus, number fields, text fields, checkbox, dates etc. Below is a description of the different field types.
Address - when the field is clicked a popup will appear with the possibily of adding address information
Colour - displays the name field and makes it possible to assign a color to the field
Date - will display a calendar, making it easy to add a certain date
Icon - makes it possible to add icon
Icon with link - makes it possible to add icon with link
Long text - the user can enter several lines of text
Marking - this gives a box, which you can check or not
Multi check - here several fields can be specified, which all can be checked
Number - the user can only enter numbers, see also the section Expressions below
One of many - this gives a list, where the user only can choose one of the possibilities
One of many (with index) - this gives a list, where the user only can choose one of the possibilities; each option should have the format <index>:<text>, eg. "THING:This is a thing" or "3:The valve doesnt work"
Person - the field refers to a person in the Person module
Team - Will display a dropdown of the teams created in your Microbizz setup
Text - the user can enter a single line of text, see also the section Expressions below
Time - the user needs to choose a date
URL - the user needs to add an URL
Be aware that you need to have HTTP:// or www before the link before it will be clickable
User - makes it possible to assign existing users to the field, adding a search and select function
Edit / delete custom fields
Choose SETTINGS > CUSTOM FIELDS in the top menu > Click on the pencil next to the custom field, this will display the options: Edit and Delete.
Text fields
Text fields can have a sub type, which can be one of these: Text, Email, Phone, Readonly, Label, Expression, Script.
The Email and Phone subtypes limit what values are allowed to be input.
The Readonly subtype prevents you from typing anything into the field, so the field can only be updated via API or import filters.
The Label subtype doesn't have a value, so it only displays the title of the field.
Expressions are described below. Script is still experimental.
Expressions
A custom field holds a static value, it doesn't change unless the field is edited somehow. The exception is text and number fields, which may hold an expression. Expressions are evaluated every time the field is displayed somewhere, and may then calculate a value based on fields from other objects.
F.ex. a expression custom field on a task may read a value from a field on the company to which the task belongs; the value may be further manipulated, through mathematical or textual functions.
This is a functionality that has to be enabled by Ventu. There are 3 variants of this:
Expression - this uses internal field names, you can see a list of the available fields in Microbizz, in the System module PLUGINS > EXPRESSION FIELDS.
Expression (new syntax) - this uses the field names that are documented in the API documentation, and is much slower than 1; this is only available if enabled by Ventu. Don’t mix new and old syntax expression fields.
Script - this allows for entire scripts to be executed when a custom field is displayed, and the output may be formatted in more complex ways; this is beyond what most Microbizz solutions may need; the documentation for scripts is available in the technical doc.
When the expression is evaluated, there is a variable named this which describes the object (task or whatever).
As describe above, a task custom field may read values from the company; the this variable holds information about connected objects, and also holds the various fields from the object.
Object | List of connected objects |
|---|---|
Customer | this.person this.user |
EdiInvoice | this.todo this.user this.customer |
Equipment | this.placeofhome this.user |
Invoice | this.user this.customer |
InvoiceLine | this.todo this.customer |
Person | |
Project | this.user |
Registration | this.todo this.user this.customer |
Task | this.customer this.user this.project |
User | |
Product | |
SalesContract | this.customer this.user |
Event | this.user this.customer |
See also: Hvordan bruger man udtryksevaluering tillægsfelter?
Examples
The various functions has described in the script documentation.
Object | Expression | Explanation |
|---|---|---|
Task | this.customer.customernumber | Display the company's customer number. |
Task | this.customer.gvd("custom14") | Assuming custom field 14 is a user field: Display the name of the user in the custom field. this.customer.custom14 would simply display the ID of the user. |
Task | this.price * 1.10 | Display the task price + 10%. |
User | (this.custom12 + this.custom13)/2 | Display the average of the two custom fields with IDs 12 and 13. |
Task | Math.ceil( (Date.strtotime(this.tclosedate) - Date.strtotime(this.tcreatedate) ) / 86400) | Number of days that the task was open; this will display a large negative number if the task isn't closed |